Apply as Organizer
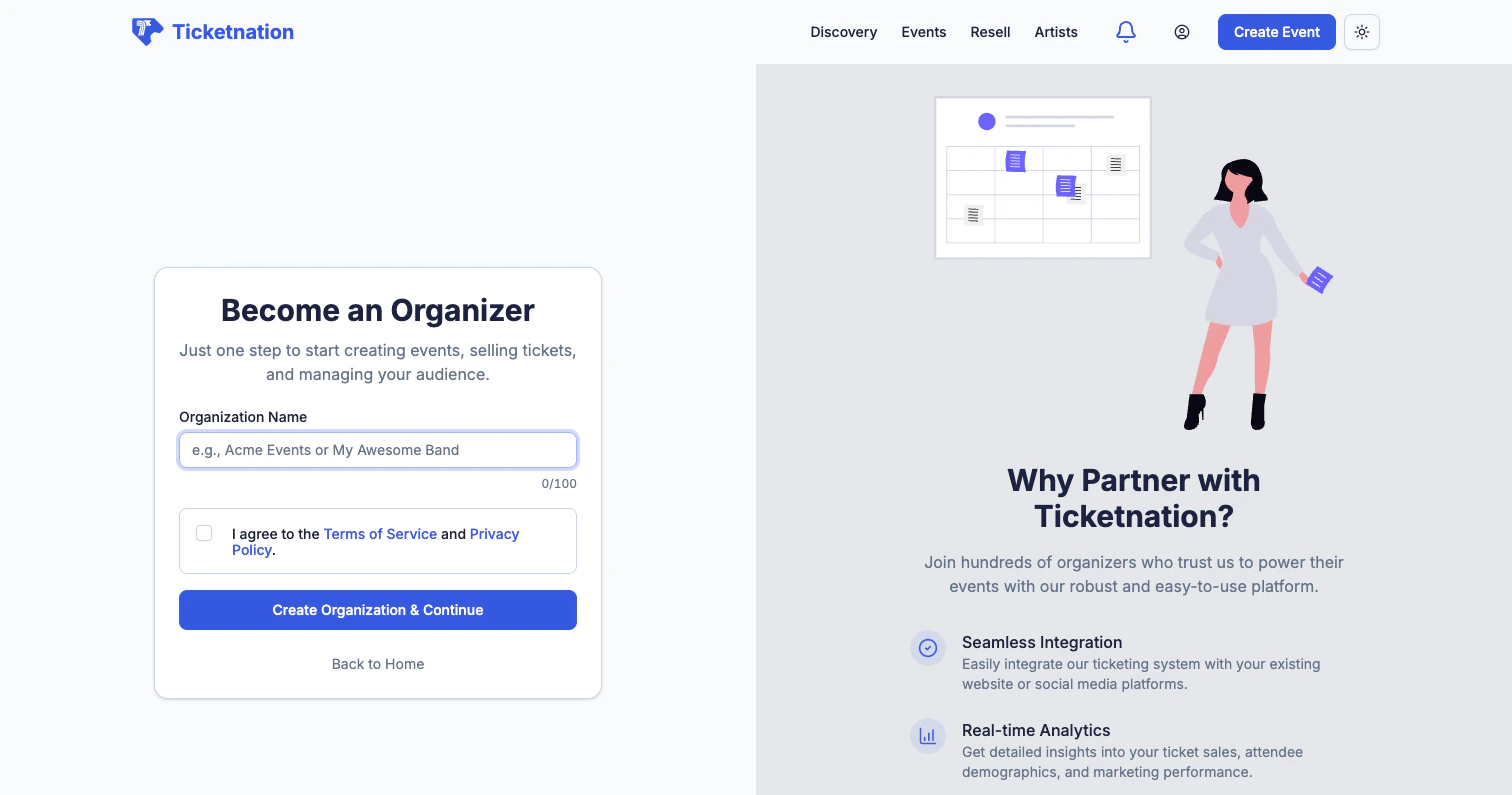
Create Organization
Once approved, set up your organization profile:- Organization name and slug (your custom URL)
- Logo and banner for branding
- Description — tell attendees who you are
- Payment configuration — connect your bank account for payouts
- Team members — invite collaborators with role-based permissions
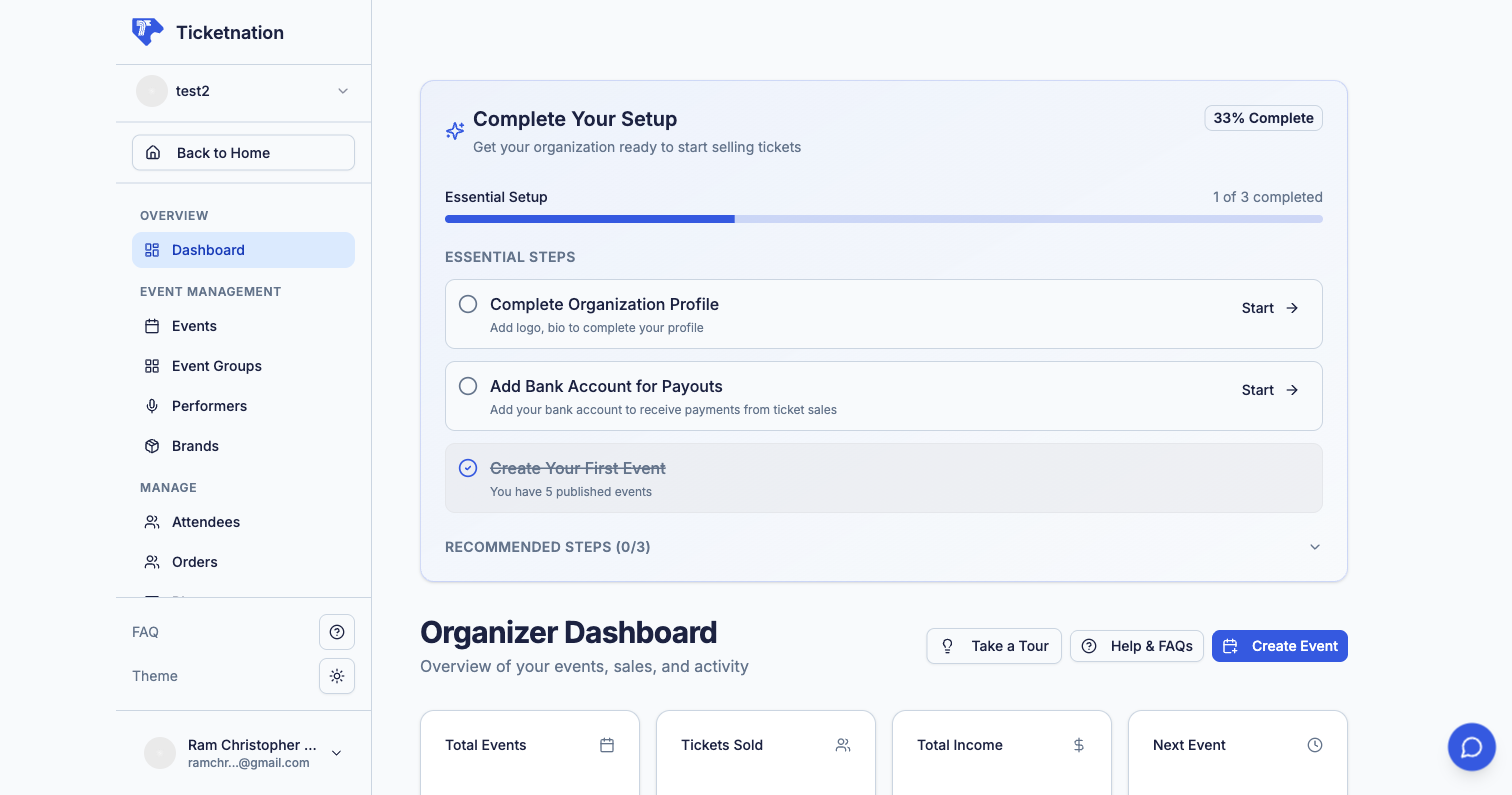
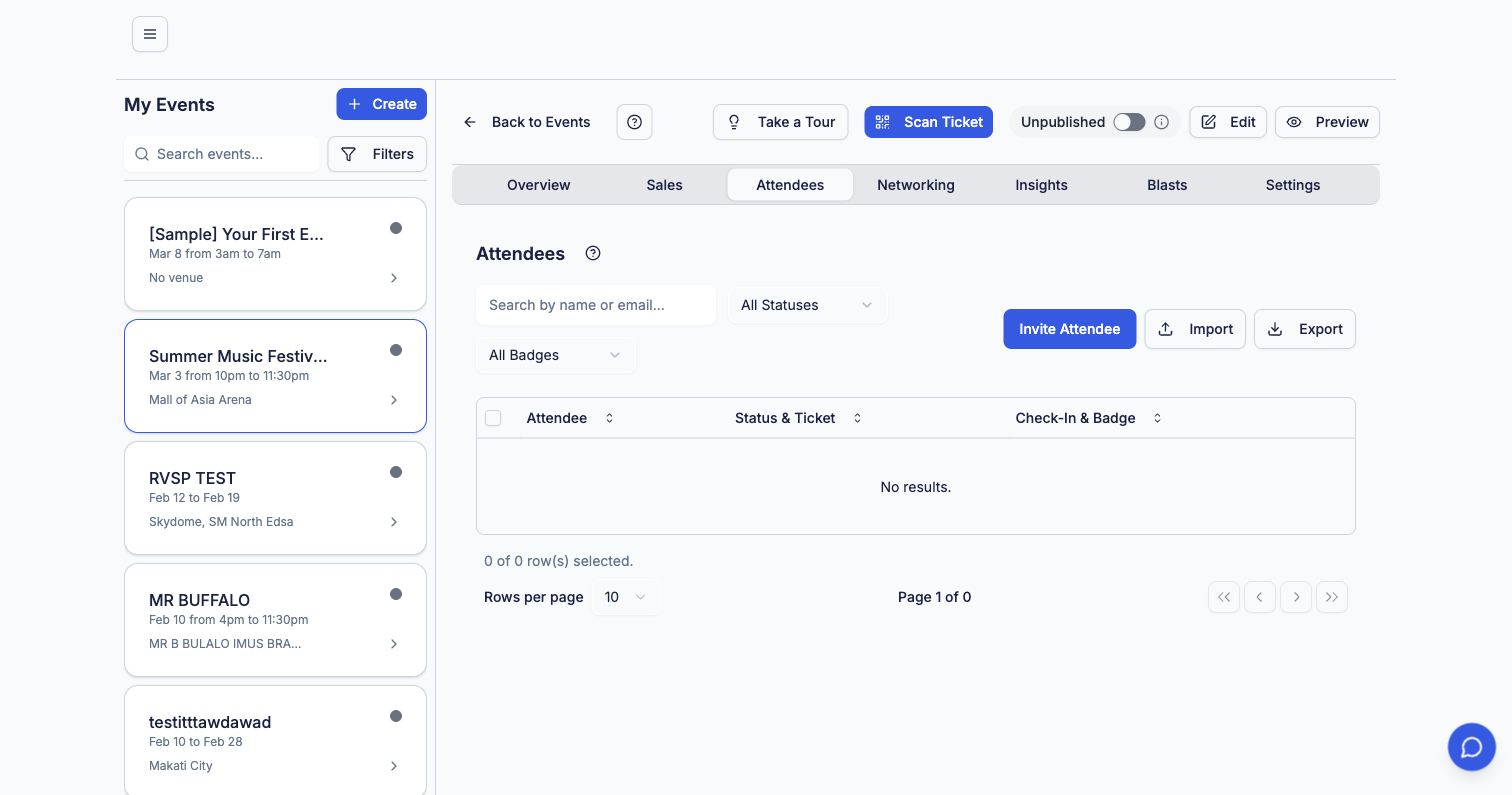
Organizer Dashboard
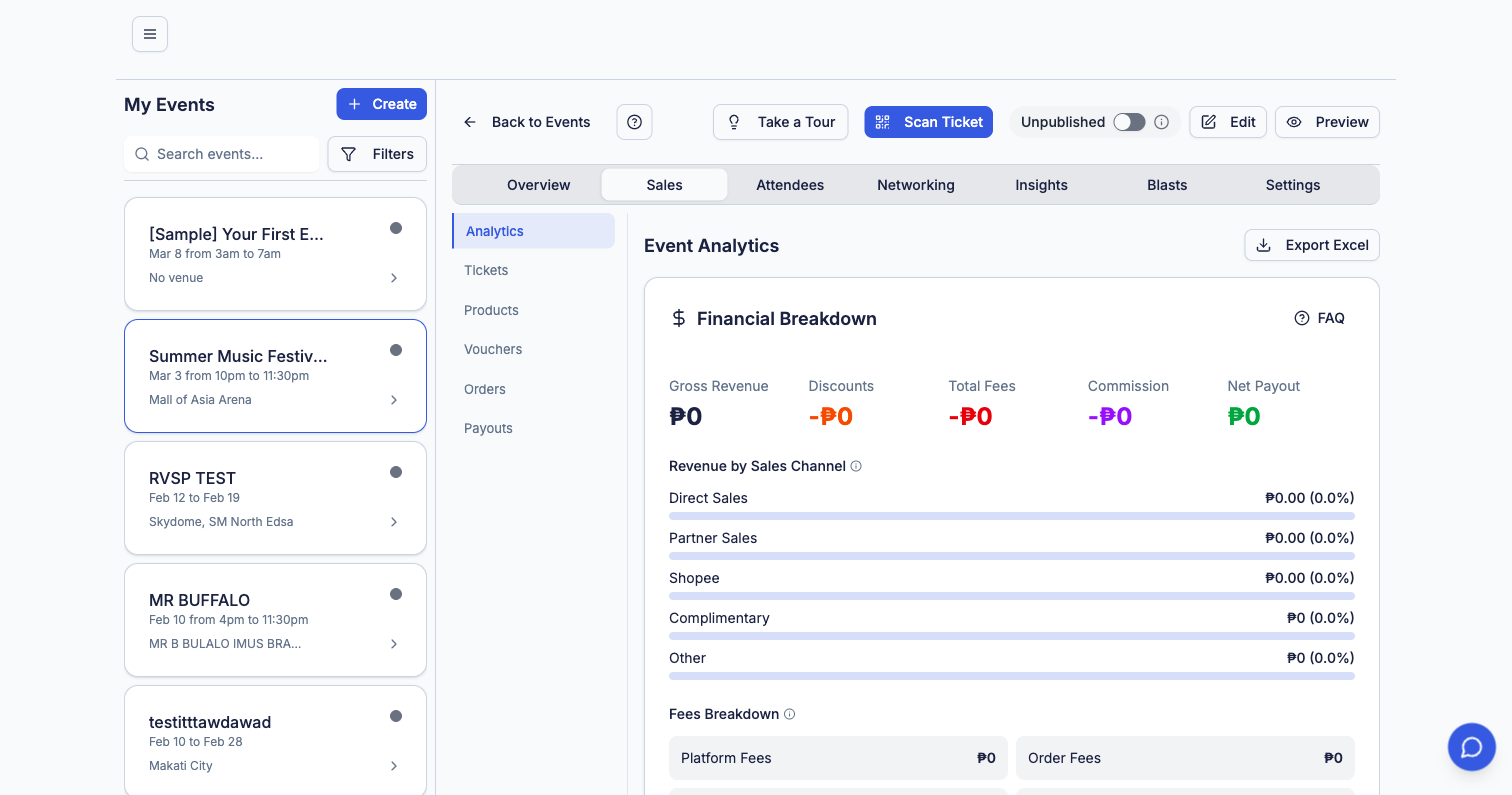
Sales Overview
Total ticket sales, revenue, and trends across all your events.
Upcoming Events
A quick view of your next events with countdowns and status.
Recent Orders
Latest ticket purchases with buyer details and payment status.
Quick Actions
One-click buttons for common tasks — create event, view reports, manage attendees.
Create an Event
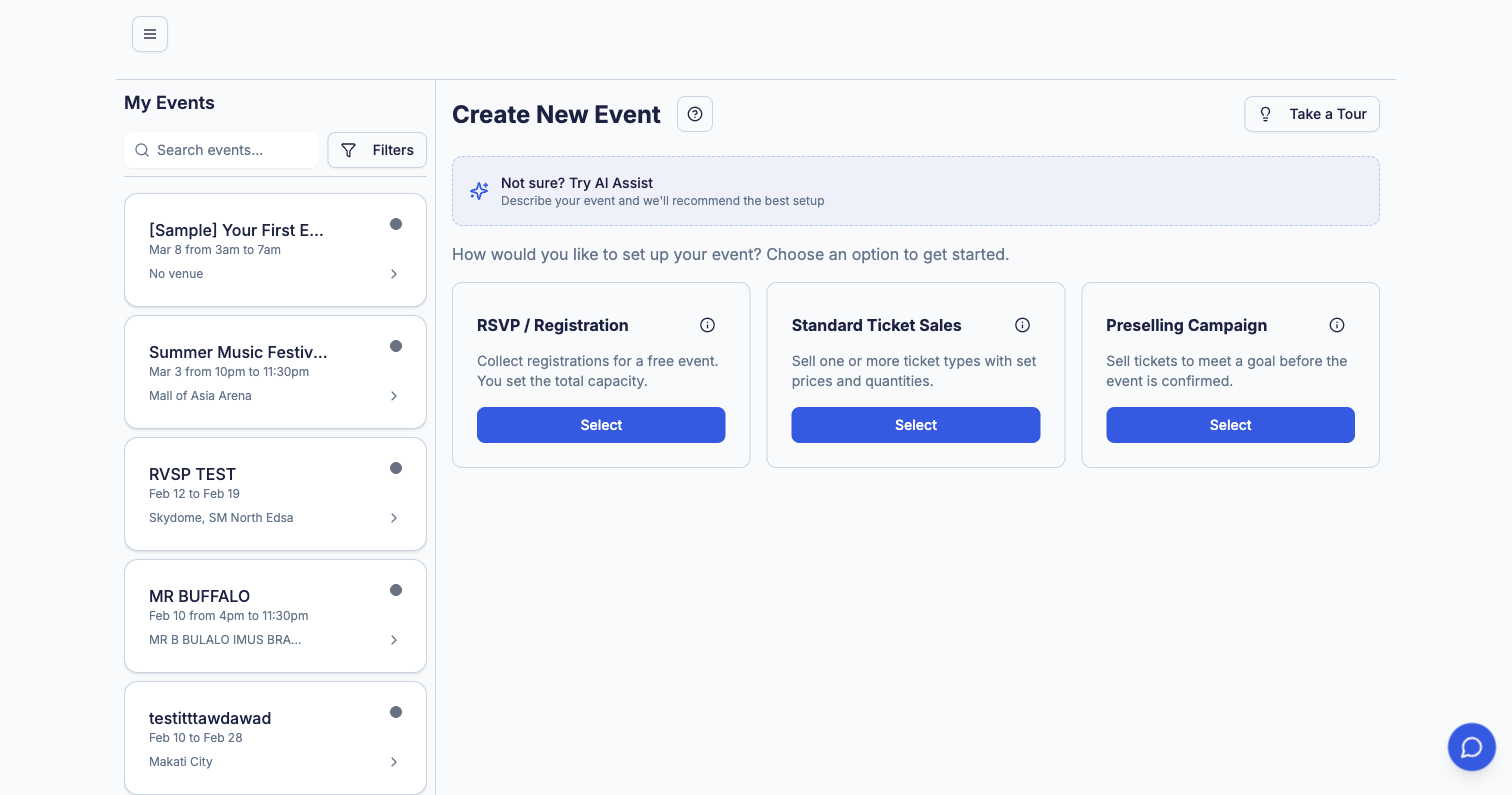
Setting Up Your Event
When creating an event, you’ll configure:Basic Details
Basic Details
Event name, subtitle, description, category, URL slug, and cover image. Use the rich text editor for detailed descriptions with formatting, images, and embedded media.
Dates & Time
Dates & Time
Start and end dates, timezone, door opening time, and whether your event spans multiple days.
Venue & Location
Venue & Location
Select from existing venues or add a new one. Supports physical locations with Google Maps integration and online/virtual events.
Ticket Types & Pricing
Ticket Types & Pricing
Create multiple ticket tiers (General Admission, VIP, Early Bird, etc.) with individual pricing, quantity limits, sale windows, and descriptions. Supports free and paid tiers on the same event.
Performers & Schedule
Performers & Schedule
Add artists, speakers, or performers to your event. Create a detailed schedule with time slots and stage assignments.
Branding & Customization
Branding & Customization
Custom event page colors, themes, and branding. Upload banners, logos, and promotional images.
Delivery & Check-in
Delivery & Check-in
Configure how tickets are delivered — QR codes, e-tickets, or will-call. Set up check-in options for door scanning.
Visibility & Access
Visibility & Access
Choose between public (discoverable on the platform) or private (accessible only via direct link). Set password protection if needed.
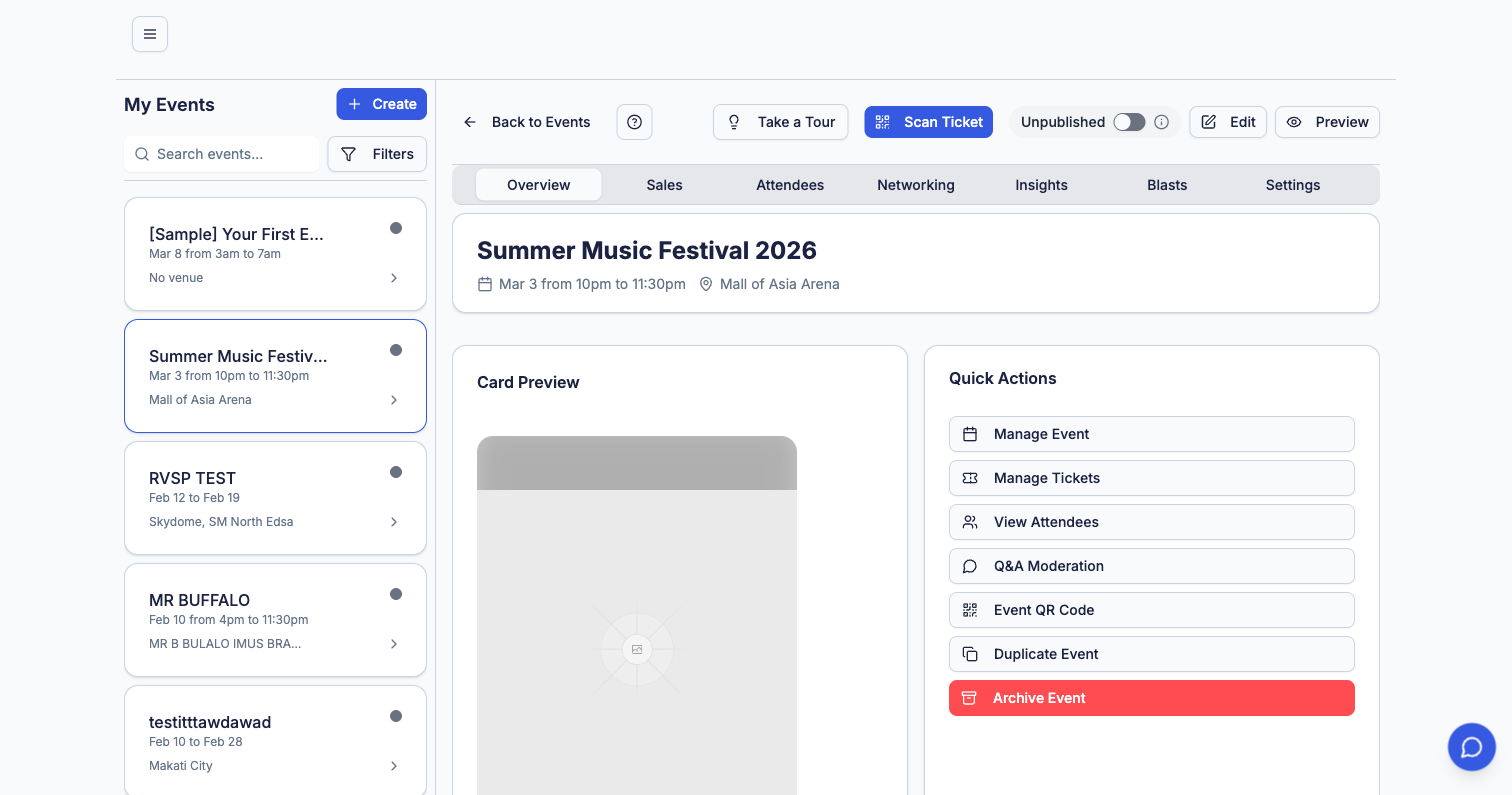
Event Lifecycle
Events follow a clear lifecycle from creation to completion:Event List
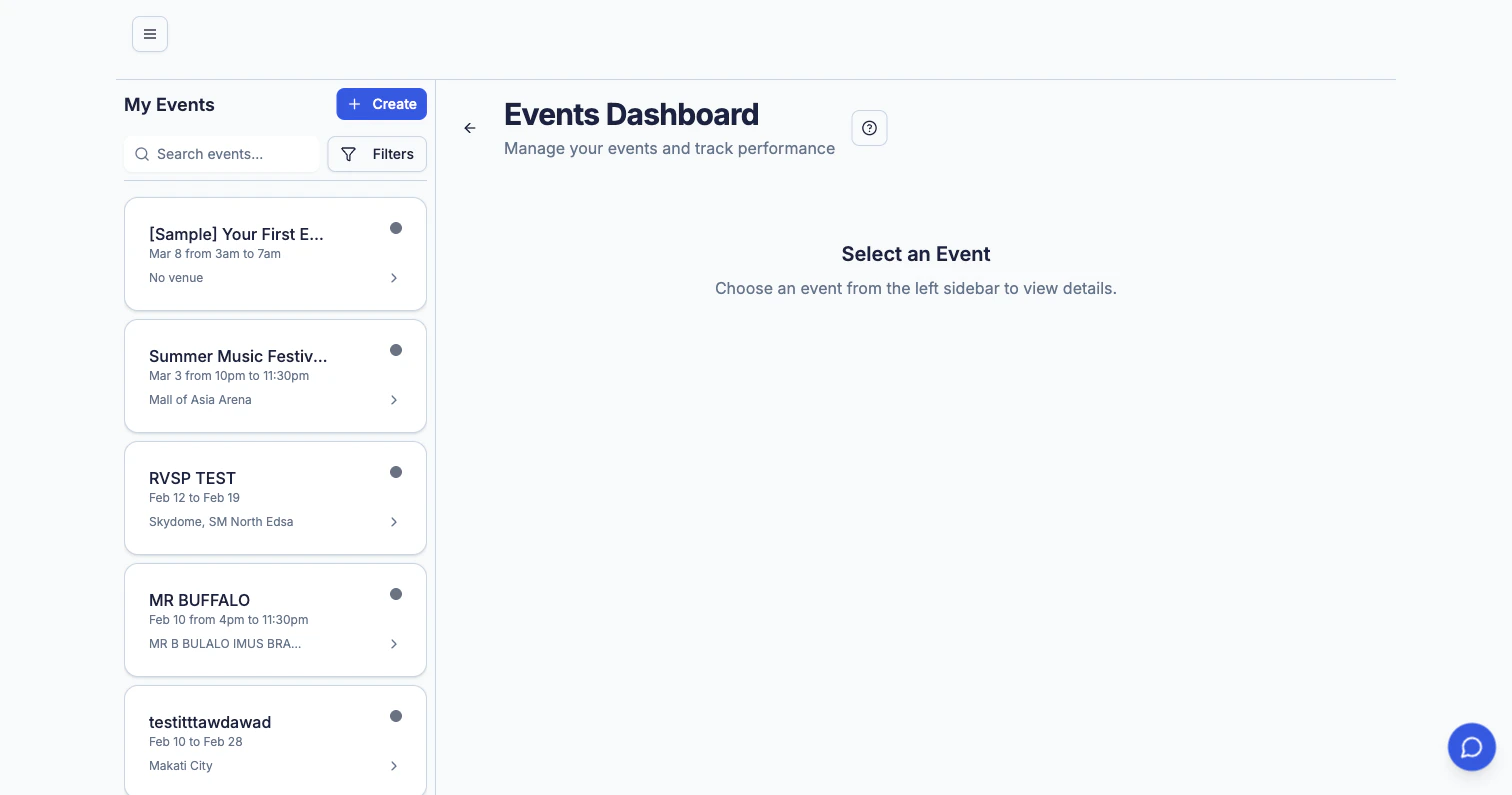
- Status indicators — color-coded badges for Draft, Published, Live, Completed, Cancelled, and Archived
- Search and filters — find events by name, status, date range, or category
- Sorting — by date, name, or ticket sales
- Quick actions for each event:
- Edit — jump to event settings
- Duplicate — clone an event with all its settings as a starting point
- Preview — see how it looks to attendees
- Pause sales — temporarily stop ticket sales without cancelling
- Archive — move completed events out of your active list
Event Details & Settings
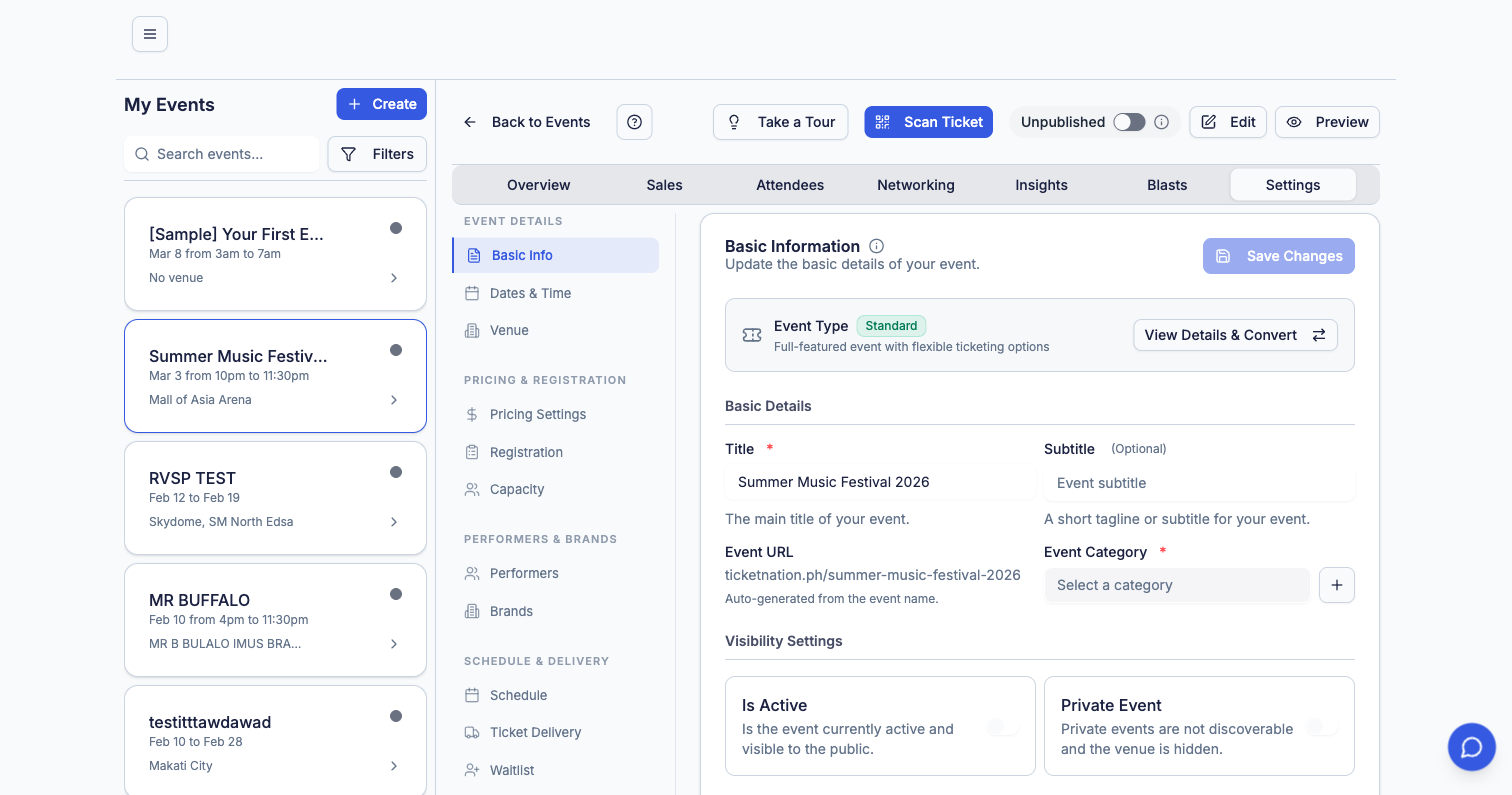
Settings Sidebar
The Settings tab has its own navigation for granular control:- Basic Info — name, description, category, and URL
- Dates & Time — event schedule and timezone
- Venue — location details and map
- Pricing Settings — commission and fee configuration
- Registration — custom registration form fields
- Capacity — maximum attendee limits per tier and overall
- Performers — manage artist and speaker lineup
- Brands — sponsor and partner logos
- Schedule — multi-session agenda and timetable
- Ticket Delivery — QR code, e-ticket, and will-call options
- Waitlist — enable and manage waitlist when tickets sell out
Archiving Events
Once an event is completed, you can archive it to keep your event list clean and focused on active work.Archived events are not deleted — they’re moved out of your active view but remain fully accessible for reporting, analytics, and historical reference.
- Removes the event from your main event list
- Preserves all data — sales, attendees, orders, and analytics
- Archived events can be unarchived at any time
- Useful for keeping your dashboard organized when managing many events
Tips for Organizers
Start with a Draft
Create your event early as a draft. You can refine details and preview before publishing.
Use Early Bird Pricing
Create time-limited early bird tiers to drive initial ticket sales and build momentum.
Add Performers
Events with artist or speaker profiles get more visibility on the discovery page.
Send Blasts
Use the built-in email blast feature to notify past attendees about your new events.